Category: Garage Door Page 1 of 2

Guide to Garage Door Replacement Panel Costs – Ryder Garage Doors

As a homeowner who recently faced the need for garage door repairs, I understand the importance of budgeting and planning for unexpected expenses. One common issue that homeowners may encounter is damage to their garage door panels, whether due to accidental impact, weather-related incidents, or normal wear and tear. When faced with the need for garage door panel replacement, it’s essential to understand the costs involved and factors that can influence pricing.

I’ll explore the realm of garage door replacement panel costs, offering insights and tips to assist homeowners in making informed decisions based from Garage Door Repair Vancouver WA.

Factors Influencing Garage Door Replacement Panel Costs

Several factors can influence the cost of garage door replacement panels, including:

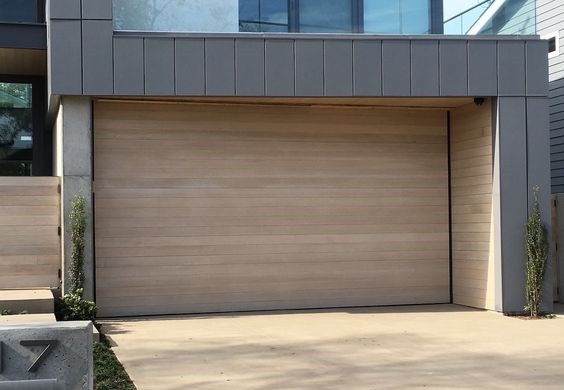
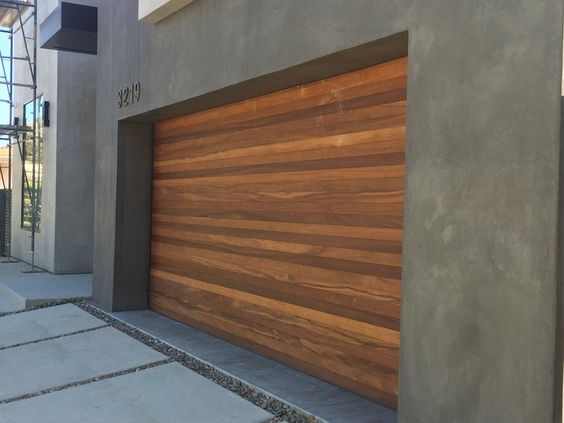
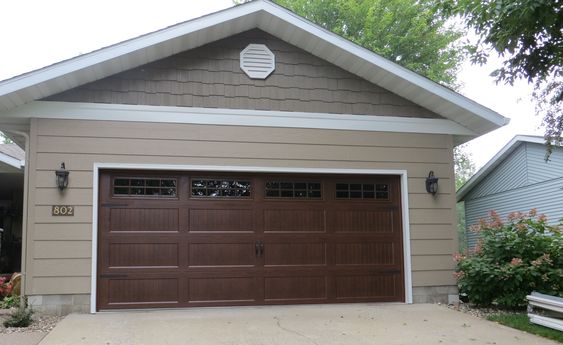
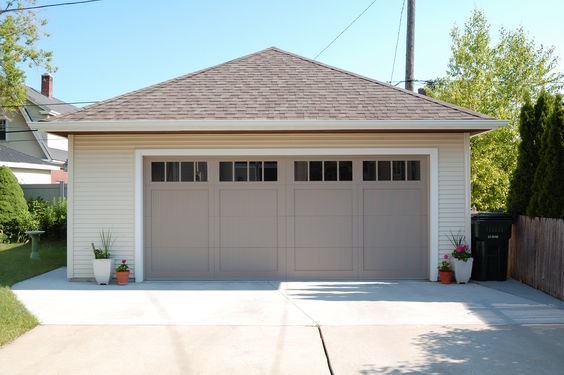
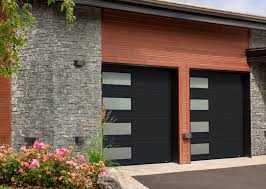
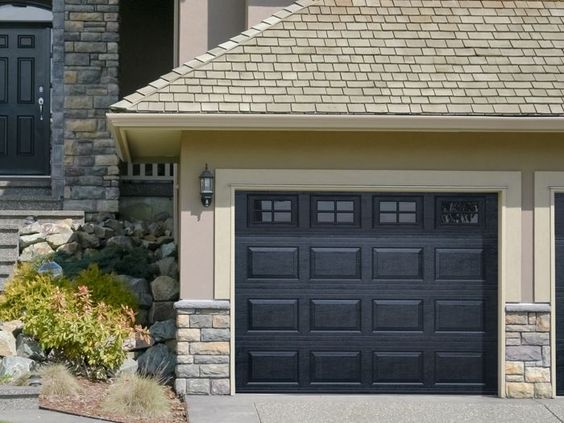
  1. Material: Garage door panels are available in a variety of materials, including steel, aluminum, wood, and composite materials. The cost of replacement panels will vary depending on the material chosen, with steel panels typically being the most affordable option and wood panels often commanding a higher price due to their aesthetic appeal.
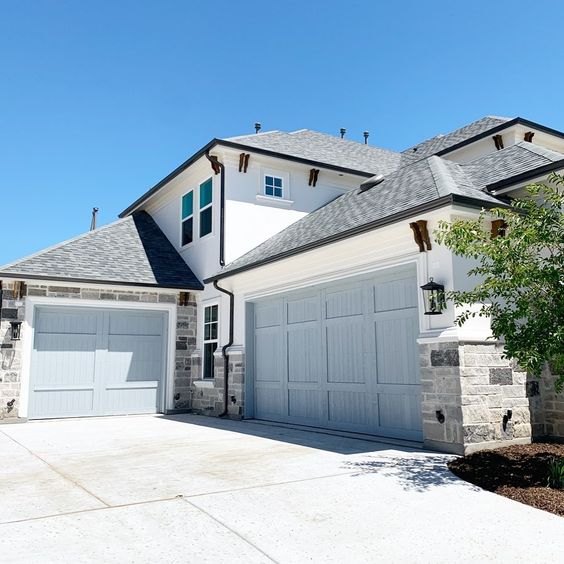
  2. Size and Design: The size and design of the replacement panels will also affect the cost. Standard-sized panels for single-car garage doors are generally more affordable than custom-sized panels or those designed for oversized doors. Additionally, panels with intricate designs or decorative features may be priced higher than simple, plain panels.
  3. Brand and Model: If your garage door is part of a specific brand or model, replacement panels may need to be sourced from the manufacturer to ensure compatibility and consistency in appearance. Replacement panels from the original manufacturer may be more expensive than aftermarket options or generic panels.
  4. Insulation: Insulated garage door panels provide thermal efficiency and noise reduction benefits but tend to cost more than non-insulated panels. The level of insulation, measured by the R-value, can impact the cost of replacement panels. Higher R-value panels typically come with a higher price tag.
  5. Labor Costs: In addition to the cost of the replacement panels themselves, homeowners should also consider labor costs for installation. Hiring a professional garage door technician to install the replacement panels will incur additional expenses, which can vary depending on the complexity of the installation and local labor rates.

Average Cost of Garage Door Replacement Panels

While the cost of garage door replacement panels can vary widely depending on the factors mentioned above, homeowners can expect to pay an average of $150 to $400 per panel. This estimate includes the cost of the panel itself as well as basic installation labor. However, it’s important to note that actual costs may be higher or lower depending on individual circumstances and preferences.

Cost Breakdown by Material

Here’s a breakdown of average garage door replacement panel costs by material:

  1. Steel: Steel garage door panels are the most common and affordable option, with prices typically ranging from $100 to $300 per panel. Steel panels are durable, low-maintenance, and available in a variety of finishes and styles.
  2. Aluminum: Aluminum garage door panels are lightweight, rust-resistant, and suitable for coastal areas or humid climates. Prices for aluminum panels range from $150 to $400 per panel, depending on the thickness and design.
  3. Wood: Wood garage door panels offer a traditional, elegant look and can be customized to match the architectural style of the home. However, wood panels tend to be more expensive, with prices ranging from $200 to $600 per panel depending on the type of wood and finish.
  4. Composite: Composite garage door panels combine the benefits of wood and steel, offering durability, low maintenance, and customizable designs. Prices for composite panels typically fall in the range of $150 to $500 per panel, depending on the brand and features.

Additional Costs to Consider

In addition to the cost of the replacement panels themselves, homeowners should also budget for the following potential expenses:

  1. Shipping and Delivery: If replacement panels need to be ordered from a manufacturer or supplier, shipping and delivery fees may apply. These fees can vary depending on the size and weight of the panels, as well as the distance of the delivery location.
  2. Installation: Hiring a professional garage door technician to install the replacement panels will incur additional labor costs. Installation fees can vary depending on the complexity of the installation, accessibility of the garage, and local labor rates.
  3. Hardware and Accessories: Depending on the condition of existing hardware and accessories, homeowners may need to purchase additional components such as hinges, rollers, tracks, and handles. These additional costs should be factored into the overall budget for the replacement project.

Tips for Saving Money on Garage Door Replacement Panels

While garage door replacement panel costs can add up quickly, there are several ways homeowners can save money on their replacement projects:

  1. Compare Quotes: Obtain multiple quotes from different suppliers and contractors to compare prices and find the best value for your budget.
  2. Consider DIY Installation: If you have experience with home improvement projects and feel comfortable working with tools, you may be able to save money by installing the replacement panels yourself. However, DIY installation is not recommended for complex or challenging projects.
  3. Explore Financing Options: Some garage door manufacturers and contractors offer financing options or payment plans to help homeowners spread out the cost of replacement panels over time. Explore these options to find a payment plan that fits your budget.
  4. Maintain Regular Maintenance: To prevent the need for costly repairs or replacements in the future, practice regular maintenance and care for your garage door. Keep panels clean, lubricate moving parts, and address minor issues promptly to avoid more significant problems down the line.

Conclusion

In conclusion, according to Garage Door Repair Vancouver WA, garage door replacement panel costs can vary depending on several factors, including material, size, design, brand, and insulation. Homeowners should budget for the cost of replacement panels themselves as well as additional expenses such as shipping, delivery, installation, and hardware. By understanding the factors that influence pricing and exploring cost-saving strategies, homeowners can effectively manage the cost of their garage door replacement projects and ensure a smooth and successful outcome. Whether opting for steel, aluminum, wood, or composite panels, investing in high-quality replacement panels is an investment in the safety, functionality, and aesthetic appeal of your home’s garage door.

Ryder Garage Doors

Vancouver, WA

360-843-7981

Understanding Garage Door Spring Life Expectancy – Wallen Garage Door Repair and Installation

As a homeowner, I’ve come to appreciate the intricate mechanics behind my garage door system, particularly the role of the springs in its operation. Garage door springs are the unsung heroes, bearing the weight of the door and ensuring smooth opening and closing movements. However, like all mechanical components, garage door springs have a finite lifespan that can impact the functionality and safety of the door. Through my own experiences and research, I’ve embarked on a journey to understand garage door spring life expectancy and the factors that influence it.

In reference to Garage Door Repair, I’ll share my discoveries and offer valuable insights into prolonging the lifespan of garage door springs.

Understanding Garage Door Springs

Before delving into life expectancy, it’s essential to grasp the different types of garage door springs and their functions:

  1. Torsion Springs:
    • Torsion springs are mounted above the garage door and are responsible for counterbalancing its weight. When the door is closed, torsion springs store mechanical energy, which is released to lift the door when it’s opened.
  2. Extension Springs:
    • Extension springs are typically installed on either side of the garage door and stretch or extend to provide lifting force. Unlike torsion springs, extension springs extend and contract as the door moves, rather than winding and unwinding.

Factors Affecting Garage Door Spring Life Expectancy

  1. Quality of Materials:
    • The quality of the materials used in garage door springs significantly impacts their lifespan. High-quality springs made of durable materials such as hardened steel are more resistant to fatigue and wear, resulting in a longer lifespan.
  2. Frequency of Use:
    • The frequency with which the garage door is opened and closed directly affects the wear and tear on the springs. A door that is used multiple times a day will experience more stress on the springs than one that is used infrequently.
  3. Maintenance Practices:
    • Regular maintenance, including lubrication and inspection of the springs, can prolong their lifespan by reducing friction and preventing corrosion. Neglecting maintenance can lead to premature wear and failure of the springs.
  4. Environmental Conditions:
    • Environmental factors such as temperature fluctuations, humidity, and exposure to corrosive substances can impact the lifespan of garage door springs. Extreme temperatures and high humidity levels can accelerate corrosion and weaken the springs over time.
  5. Spring Design and Installation:
    • The design and installation of garage door springs play a significant role in their longevity. Springs that are improperly sized, installed, or adjusted are more prone to premature wear and failure. It’s essential to enlist the services of a professional installer to ensure proper installation and adjustment of the springs.

Understanding Spring Life Expectancy

The life expectancy of garage door springs can vary depending on several factors, but in general, torsion springs typically last longer than extension springs. Here’s a rough estimate of the average lifespan of garage door springs:

  1. Torsion Springs:
    • Torsion springs typically have a lifespan of around 10,000 to 20,000 cycles, with one cycle consisting of one full opening and closing of the garage door. High-quality torsion springs may last even longer, up to 30,000 cycles or more.
  2. Extension Springs:
    • Extension springs have a shorter lifespan compared to torsion springs, typically lasting around 5,000 to 10,000 cycles. However, with proper maintenance and care, extension springs can also reach the higher end of their expected lifespan range.

Prolonging Spring Lifespan

While garage door springs have a finite lifespan, there are steps homeowners can take to prolong their longevity:

  1. Regular Maintenance:
    • Schedule regular maintenance appointments with a professional garage door technician to inspect and lubricate the springs, as well as other components of the door system. Addressing any issues promptly can prevent premature wear and extend the lifespan of the springs.
  2. Proper Use:
    • Avoid excessive use of the garage door and refrain from opening and closing it unnecessarily. Be mindful of the weight capacity of the door and avoid overloading it with heavy items that can strain the springs.
  3. Monitor Performance:
    • Keep an eye out for signs of wear or damage to the springs, such as rust, corrosion, or deformation. If you notice any issues, have them addressed promptly by a qualified technician to prevent further damage.
  4. Temperature Control:
    • Maintain a consistent temperature and humidity level in the garage to minimize the risk of corrosion and rust formation on the springs. Consider insulating the garage and installing a dehumidifier if necessary.

Conclusion

In conclusion, based from Garage Door Repair, understanding garage door spring life expectancy is essential for maintaining the functionality and safety of your garage door system. By familiarizing yourself with the factors that influence spring lifespan and implementing proper maintenance practices, you can prolong the longevity of your springs and ensure the smooth operation of your garage door for years to come. Remember to prioritize safety when performing maintenance or repairs on garage door springs and enlist the services of a professional technician for any complex issues. With these insights and precautions in mind, you can enjoy peace of mind knowing that your garage door springs are in optimal condition.

Wallen Garage Door Repair and Installation

732 Bluecrab Rd Ste D, Newport News, VA 23606, United States

757-256-4543

Maximizing Security with Smart Garage Door Openers – JT’s Overhead Doors

As a homeowner who values safety and convenience, I’ve always sought out innovative solutions to protect my property and streamline daily routines. One such advancement that has transformed my home’s security and functionality is the smart garage door opener.

In this comprehensive guide based from Garage Door Repair Mesa AZ, I’ll share insights into the benefits of smart garage door openers, practical tips for maximizing security, and how these modern devices can offer peace of mind for homeowners like myself.

Understanding Smart Garage Door Openers

Before diving into the specifics of maximizing security, let’s first understand what smart garage door openers are and how they work. Smart garage door openers are innovative devices that utilize internet connectivity and mobile technology to provide remote access and control over your garage door. By connecting to a Wi-Fi network and pairing with a smartphone app, homeowners can open, close, and monitor their garage door from anywhere with an internet connection.

Benefits of Smart Garage Door Openers

Investing in a smart garage door opener offers a range of benefits beyond traditional models. Here are some key advantages:

  1. Convenience: With a smart garage door opener, you can open or close your garage door remotely using your smartphone, eliminating the need for traditional keys or remotes. This is especially convenient when you need to provide access to family members, guests, or service professionals while you’re away from home.
  2. Enhanced Security: Smart garage door openers offer advanced security features such as real-time alerts and activity logs, allowing you to monitor who accesses your garage and when. Additionally, some models offer geofencing capabilities, automatically closing the door when you leave the vicinity of your home.
  3. Integration with Smart Home Ecosystems: Many smart garage door openers are compatible with popular smart home platforms such as Amazon Alexa, Google Assistant, and Apple HomeKit. This integration allows you to control your garage door using voice commands or incorporate it into automated routines with other smart devices in your home.
  4. Remote Monitoring: With remote monitoring features, you can receive notifications on your smartphone whenever your garage door is opened or closed, providing added peace of mind and security, especially when you’re away from home.

Maximizing Security with Smart Garage Door Openers

Now that we understand the benefits of smart garage door openers, let’s explore practical tips for maximizing security:

  1. Enable Two-Factor Authentication: Many smart garage door opener apps offer two-factor authentication (2FA) as an additional layer of security. Enable 2FA to require a verification code sent to your smartphone or email whenever someone attempts to access your garage door remotely.
  2. Create Unique Access Codes: If your smart garage door opener supports it, create unique access codes for each family member, guest, or service professional who needs access to your garage. This allows you to track who is coming and going and revoke access codes as needed.
  3. Regularly Update Firmware: Keep your smart garage door opener’s firmware up to date to ensure it has the latest security patches and enhancements. Set up automatic updates if available or check for updates manually on a regular basis.
  4. Secure Your Wi-Fi Network: Protect your home network by using a strong, unique password for your Wi-Fi router and enabling WPA2 encryption. Consider setting up a separate guest network for visitors to prevent unauthorized access to your smart devices.
  5. Review Access Logs: Regularly review the access logs or activity history provided by your smart garage door opener app. Look for any unusual activity or unauthorized access attempts and take appropriate action if necessary.
  6. Install Security Cameras: Pairing your smart garage door opener with security cameras allows you to visually confirm who is accessing your garage and monitor activity in real-time. Place cameras strategically to cover all entry points and record footage in case of security incidents.
  7. Set Up Geofencing: Take advantage of geofencing features if your smart garage door opener supports them. Geofencing automatically closes the garage door when you leave a predefined area around your home, preventing unauthorized access if you forget to close it manually.
  8. Consider Integrating with a Security System: If you have a home security system, consider integrating your smart garage door opener with it for seamless monitoring and control. This allows you to manage all aspects of your home security from a single interface and receive comprehensive alerts in case of emergencies.

Conclusion

Overall, according to Garage Door Repair Mesa AZ, smart garage door openers offer unparalleled convenience, control, and security for homeowners seeking to enhance their home’s safety. By leveraging features such as remote access, real-time alerts, and integration with smart home ecosystems, you can maximize security and peace of mind while enjoying the convenience of modern technology. Whether you’re at home or away, a smart garage door opener provides an invaluable layer of protection for your property and loved ones. Invest in one today and experience the benefits firsthand.

JT’s Overhead Doors

307 N Sandal, Mesa, AZ 85205, United States

480-662-3315

Garage Door Insulation: Hiring Professionals for Efficiency – Veterans Garage Door

As a homeowner who values comfort and energy efficiency, I’ve come to realize the significant impact that garage door insulation can have on both aspects. While many homeowners focus on insulating their living spaces, the garage is often overlooked, despite its potential to affect the overall comfort and energy efficiency of the home.

In this article, I’ll delve into the benefits of garage door insulation and why hiring professionals is essential for achieving optimal results by following Garage Door Repair Sarasota FL.

Understanding the Importance of Garage Door Insulation

Before discussing the benefits of hiring professionals for garage door insulation, it’s crucial to understand why insulation matters in the first place. The garage is a transitional space between the outdoors and the interior of the home, making it susceptible to temperature fluctuations. Without proper insulation, the garage can become excessively hot in the summer and frigid in the winter, compromising comfort and driving up energy bills.

Insulating the garage door helps create a barrier against outdoor temperatures, keeping the space more comfortable year-round. Additionally, insulation can improve soundproofing, reduce noise from outside sources, and provide added protection against moisture and pests. Ultimately, garage door insulation contributes to a more energy-efficient home and enhances overall comfort for you and your family.

The Benefits of Hiring Professionals for Garage Door Insulation

While some homeowners may attempt to insulate their garage doors themselves, hiring professionals offers several distinct advantages:

1. Expertise and Experience

Professional garage door insulation installers have the knowledge, skills, and experience to ensure the job is done correctly. They understand the nuances of different garage door materials and insulation options, allowing them to recommend the most suitable solution for your specific needs.

2. Proper Installation Techniques

Proper installation is crucial for the effectiveness of garage door insulation. Professionals have access to specialized tools and equipment, enabling them to install insulation evenly and securely. They also know how to address potential challenges, such as irregularities in the door’s surface or obstructions in the garage.

3. Customized Solutions

Every garage is unique, and professionals can tailor insulation solutions to suit your garage’s layout, size, and configuration. They’ll assess factors such as the type of garage door, existing insulation (if any), and climate conditions to determine the most effective approach for maximum insulation and energy efficiency.

4. Quality Materials

Professional garage door insulation installers have access to high-quality materials and products that may not be readily available to homeowners. They can recommend insulation materials with superior thermal resistance, durability, and longevity, ensuring long-term performance and energy savings.

5. Time and Convenience

Insulating a garage door can be a time-consuming and labor-intensive task, especially for inexperienced homeowners. Hiring professionals allows you to save time and effort while ensuring the job is completed efficiently and effectively. You can rest assured that your garage door insulation project is in capable hands, allowing you to focus on other priorities.

6. Warranty and Guarantee

Many professional insulation companies offer warranties and guarantees on their workmanship and materials. This provides added peace of mind knowing that you’re protected against defects or issues that may arise after installation. If any problems occur, you can rely on the expertise of the professionals to address them promptly.

Conclusion

Garage door insulation is a valuable investment that can significantly improve comfort, energy efficiency, and overall functionality of your home. While some homeowners may consider DIY insulation, hiring professionals offers numerous benefits, including expertise, proper installation techniques, customized solutions, quality materials, time savings, and warranty protection.

Overall, according to Garage Door Repair Sarasota FL, when it comes to enhancing comfort and efficiency in your home, entrusting the job to experienced professionals ensures optimal results and long-term satisfaction. By choosing to hire professionals for your garage door insulation project, you’re investing in the comfort, energy efficiency, and value of your home for years to come.

Veterans Garage Door

6497 Parkland Dr F, Sarasota, FL 34243, United States

941-699-6198

Energy-Efficient Garage Door Options: My Guide to a Greener Home – Brothers Garage Door Service

As a homeowner committed to reducing my environmental footprint and saving on energy costs, I understand the importance of investing in energy-efficient solutions for every aspect of my home. One often overlooked area is the garage door, which can significantly impact energy efficiency and comfort levels within the home.

In Garage Door Repair Livonia MI guide, I’ll share my insights and personal experiences to help you explore energy-efficient garage door options, empowering you to make informed decisions for a greener and more sustainable home.

Understanding the Importance of Energy-Efficient Garage Doors

Before we delve into specific energy-efficient garage door options, let’s discuss why investing in such doors is essential:

  1. Temperature Regulation: A well-insulated garage door helps maintain more consistent temperatures inside the garage, reducing the transfer of heat or cold to adjacent living spaces and improving overall comfort levels.
  2. Energy Savings: By minimizing heat loss or gain through the garage door, energy-efficient options can help reduce the workload on heating and cooling systems, resulting in lower energy bills and reduced environmental impact.
  3. Durability and Longevity: Energy-efficient garage doors are often constructed with high-quality materials and insulation, which can contribute to their durability and longevity. This means fewer repairs and replacements over time, further reducing environmental impact.
  4. Increased Home Value: Investing in energy-efficient upgrades, including garage doors, can enhance the overall value and marketability of your home, appealing to eco-conscious buyers and potentially commanding a higher resale price.

Exploring Energy-Efficient Garage Door Features

Now, let’s take a closer look at the key features and options to consider when choosing energy-efficient garage doors:

  1. Insulation Materials: Opt for garage doors constructed with high-quality insulation materials, such as polyurethane or polystyrene foam. These materials provide excellent thermal resistance, helping to maintain consistent temperatures inside the garage and improve energy efficiency.
  2. R-Value: Pay attention to the R-value of the garage door, which measures its thermal resistance. A higher R-value indicates better insulation performance and greater energy efficiency. Look for garage doors with R-values tailored to your climate and insulation needs.
  3. Weather Stripping: Choose garage doors equipped with durable weather stripping along the bottom and sides to seal out drafts, moisture, and pests. Tight seals help prevent air infiltration and heat loss, enhancing energy efficiency.
  4. Energy-Efficient Windows: If your garage door includes windows, opt for energy-efficient glass options, such as double-pane or low-emissivity (Low-E) glass. These windows help minimize heat transfer while maximizing natural light, improving energy efficiency and comfort.
  5. Sealed Panels and Joints: Look for garage doors with sealed panels and joints to minimize air leakage and improve insulation performance. Well-sealed doors provide a tighter barrier against outdoor elements, enhancing energy efficiency and comfort.

Comparing Energy-Efficient Garage Door Materials

Several materials are commonly used for energy-efficient garage doors, each with its own advantages and considerations:

  1. Steel: Steel garage doors are durable, low-maintenance, and offer excellent insulation options. Insulated steel doors feature foam or polystyrene insulation cores, providing superior thermal resistance and energy efficiency.
  2. Aluminum: Aluminum garage doors are lightweight, corrosion-resistant, and offer good insulation properties when combined with foam insulation. They are suitable for coastal areas and modern architectural styles.
  3. Wood Composite: Wood composite garage doors combine the natural beauty of wood with the durability of composite materials. They offer good insulation performance and can be customized with various finishes and designs.
  4. Fiberglass: Fiberglass garage doors are lightweight, durable, and resistant to corrosion and rot. They offer moderate insulation properties and are suitable for coastal environments where moisture is a concern.
  5. Vinyl: Vinyl garage doors are low-maintenance, energy-efficient, and resistant to dents, rust, and fading. They offer good insulation performance and are available in a variety of styles and colors.

Making the Right Choice for Your Home

When selecting energy-efficient garage doors for your home, consider the following factors to ensure the best fit:

  1. Climate and Weather Conditions: Choose garage doors with insulation levels appropriate for your climate, taking into account factors such as temperature extremes, humidity, and exposure to wind and precipitation.
  2. Aesthetic Preferences: Select garage doors that complement the architectural style and design aesthetic of your home, whether you prefer traditional, contemporary, or custom designs.
  3. Budget and Long-Term Savings: Evaluate the upfront cost of energy-efficient garage doors against potential long-term savings in energy bills, maintenance, and replacement costs. Consider the return on investment and lifetime value of the doors.
  4. Environmental Impact: Choose garage doors made from sustainable materials and manufactured using eco-friendly processes, minimizing environmental impact and contributing to a greener home.

Conclusion: Enhancing Comfort and Sustainability

Overall, based from Garage Door Repair Livonia MI, investing in energy-efficient garage doors is not only a smart decision for reducing energy costs and environmental impact but also for enhancing comfort and value in your home. By selecting doors with high-quality insulation, weather sealing, and durable materials, you can enjoy improved thermal performance, lower energy bills, and greater peace of mind year-round. Whether you prioritize insulation performance, aesthetic appeal, or sustainability, there are energy-efficient garage door options to suit your needs and preferences.

Brothers Garage Door Service

29522 Wentworth St, Livonia, MI 48154, United States

734-292-0971

Handling Garage Door Sensor Issues: Ensuring Safety and Functionality – First Call Garage Doors

As a homeowner who relies on my garage door for daily convenience and security, encountering issues with its sensors can be both frustrating and concerning. The sensors play a crucial role in ensuring safe operation by detecting obstructions and preventing the door from closing if there’s a potential hazard in its path. However, when these sensors malfunction or fail to function properly, it can compromise the safety and functionality of the entire garage door system.

In this article, I’ll share my experiences and insights into handling garage door sensor issues to ensure safety and functionality for homeowners everywhere by following Garage Door Repair.

Understanding the Importance of Garage Door Sensors

The sensors, often located near the bottom of the garage door tracks, consist of photoelectric eyes that transmit an invisible beam across the door opening. When an obstruction interrupts this beam while the door is closing, the sensors detect the obstruction and signal the door to reverse its direction, preventing accidents and injuries. This safety mechanism is essential for protecting vehicles, belongings, and individuals from being trapped or crushed by the closing door, making it a critical component of the garage door system.

Common Issues with Garage Door Sensors

1. Misalignment:

Misalignment is one of the most common issues affecting garage door sensors. If the sensors are not properly aligned or positioned facing each other, they may fail to detect obstructions accurately, leading to erratic behavior or malfunctioning of the door.

2. Dirty or Obstructed Sensors:

Dust, dirt, debris, or spider webs can accumulate on the sensors’ lenses over time, obstructing the infrared beam and interfering with their ability to detect obstacles. Regular cleaning and maintenance are essential for ensuring optimal sensor performance and reliability.

3. Wiring Problems:

Faulty wiring, loose connections, or damaged cables can disrupt the communication between the sensors and the garage door opener, causing intermittent sensor failures or complete sensor malfunction.

4. Sunlight or Glare Interference:

Direct sunlight, reflections, or glare can interfere with the sensors’ infrared beam, triggering false readings and preventing the door from closing properly. Installing sun shields or adjusting the angle of the sensors can help mitigate this issue.

Troubleshooting and Resolving Sensor Issues

1. Check Alignment and Positioning:

Inspect the sensors to ensure they are aligned properly and facing each other across the door opening. Use a level to verify that both sensors are at the same height and angle, and adjust their position if necessary to eliminate any gaps or misalignment.

2. Clean the Sensor Lenses:

Carefully clean the lenses of the sensors using a soft, dry cloth to remove any dirt, dust, or debris that may be obstructing the infrared beam. Avoid using abrasive cleaners or solvents that could damage the sensors.

3. Test and Adjust Wiring Connections:

Inspect the wiring connections between the sensors and the garage door opener to ensure they are secure and free from damage or corrosion. Tighten any loose connections and replace any damaged cables or wires as needed to restore proper communication between the sensors and the opener.

4. Shield Sensors from Sunlight:

If sunlight or glare is causing interference with the sensors, consider installing sun shields or shades to block direct sunlight and minimize reflections. Adjusting the angle of the sensors or installing shades on nearby windows can also help reduce glare and improve sensor performance.

5. Reset and Realign Sensors:

If troubleshooting steps fail to resolve the issue, try resetting the sensors by disconnecting power to the garage door opener and then reconnecting it after a few minutes. Once power is restored, realign the sensors and test the door to see if the problem persists.

Preventative Maintenance Tips for Garage Door Sensors

1. Regular Inspection:

Perform periodic visual inspections of the sensors to check for signs of damage, misalignment, or obstruction. Clean the sensor lenses and surrounding areas as needed to ensure optimal performance.

2. Test Sensor Functionality:

Test the sensors regularly by placing an object in the door’s path while closing it to verify that the sensors detect the obstruction and trigger the door to reverse its direction. If the door fails to reverse, immediately address any issues with the sensors or the garage door opener.

3. Keep Surrounding Areas Clear:

Maintain a clear zone around the sensors to prevent obstructions from blocking the infrared beam. Trim vegetation, remove clutter, and avoid placing objects near the sensors that could interfere with their operation.

4. Schedule Professional Inspection and Maintenance:

Consider scheduling annual or biannual inspections with a qualified garage door technician to inspect, lubricate, and tune up the entire door system, including the sensors, springs, cables, and tracks. Professional maintenance can help identify and address potential issues before they escalate into more significant problems.

Conclusion

Overall, by following Garage Door Repair, garage door sensors are integral to the safe and reliable operation of the garage door system, providing essential protection against accidents, injuries, and property damage. By understanding common sensor issues, troubleshooting techniques, and preventative maintenance tips, homeowners can ensure the safety and functionality of their garage doors year-round. Whether it’s aligning sensors, cleaning lenses, testing functionality, or scheduling professional maintenance, taking proactive steps to address sensor issues can help safeguard the well-being of occupants and enhance the longevity of the garage door system. So, when it comes to handling garage door sensor issues, prioritize safety, and take the necessary precautions to keep your garage door operating smoothly and securely.

First Call Garage Doors

20527 Farm to Market 1093 Unit B205, Richmond, TX 77407, United States

713-248-2684

A Step-by-Step Guide: Changing the Battery in Your Garage Door Opener – Southern Home Creations Garage Doors & Openers

As a homeowner, maintaining the functionality of your garage door opener is essential for convenience and security. One common maintenance task is replacing the battery in your garage door opener remote. While it may seem daunting at first, changing the battery is a straightforward process that can be completed in just a few simple steps.

In this comprehensive guide from Garage Door Repair, I’ll walk you through the process of changing the battery in your garage door opener, ensuring smooth operation for years to come.

Step 1: Gather Necessary Supplies

Before you begin, gather the following supplies:

  • New battery: Check your garage door opener manual or examine the existing battery to determine the correct type and size needed.
  • Screwdriver: Depending on the type of remote, you may need a small screwdriver to access the battery compartment.
  • Cleaning cloth: It’s always a good idea to clean the remote and battery contacts while you have it open.

Step 2: Locate the Battery Compartment

Next, locate the battery compartment on your garage door opener remote. This is typically found on the back of the remote and may be secured with screws or a sliding cover. Use the appropriate tool to open the compartment and access the battery.

Step 3: Remove the Old Battery

Carefully remove the old battery from the compartment, taking note of its orientation. Some remotes use coin cell batteries that can be easily popped out, while others may have batteries secured with clips or springs. Use caution to avoid damaging the battery or the remote.

Step 4: Clean the Battery Contacts (Optional)

While the battery compartment is open, take a moment to inspect the battery contacts for any dirt or corrosion. If necessary, use a clean, dry cloth to gently wipe away any debris. Clean contacts ensure proper battery connectivity and prevent issues with the remote’s functionality.

Step 5: Insert the New Battery

Insert the new battery into the compartment, ensuring that it is positioned correctly according to the markings or instructions. Press the battery firmly into place, making sure it is securely seated in the compartment. If the battery is loose, it may cause intermittent connectivity issues with the remote.

Step 6: Close the Battery Compartment

Once the new battery is installed, carefully close the battery compartment. If there are screws, tighten them securely to ensure the compartment is sealed properly. For remotes with sliding covers, slide the cover back into place until it clicks or snaps shut.

Step 7: Test the Remote

With the new battery installed and the compartment securely closed, it’s time to test the remote. Stand within range of your garage door opener and press the button to ensure that the remote sends a signal and operates the door as expected. If the remote does not function properly, double-check the battery installation and ensure that the contacts are clean and free of debris.

Step 8: Dispose of the Old Battery Properly

Dispose of the old battery responsibly by following local recycling guidelines. Many hardware stores, electronic retailers, or recycling centers accept used batteries for recycling or proper disposal. Avoid throwing batteries in the trash, as they can be harmful to the environment if not disposed of correctly.

Step 9: Regular Maintenance

In addition to changing the battery in your garage door opener remote, it’s important to perform regular maintenance on the opener itself. Inspect the door tracks, rollers, and springs for any signs of wear or damage, and lubricate moving parts as needed. Keeping your garage door opener well-maintained ensures smooth operation and extends its lifespan.

In conclusion, according to Garage Door Repair, changing the battery in your garage door opener remote is a simple yet essential maintenance task that ensures reliable operation and convenience. By following these step-by-step instructions and taking proper care of your garage door opener, you can enjoy smooth, hassle-free operation for years to come.

Southern Home Creations Garage Doors & Openers

4110 Tench Rd Suite D, Suwanee, GA 30024, United States

770-831-0301

Garage Door Opener: A Guide to Changing Frequencies Safely and Easily – Martin Garage Door

Being a homeowner comes with a myriad of responsibilities, one of which includes ensuring the security and functionality of your garage door opener. However, there are times when you may need to change the frequency of your garage door opener to enhance security or resolve interference issues. Having navigated through this process myself, I understand the importance of doing it correctly.

In this comprehensive Garage Door Repair guide, I’ll walk you through the steps to change the frequency on your garage door opener efficiently and safely.

Understanding the Need for Frequency Change:

Before diving into the process, it’s essential to understand why changing the frequency of your garage door opener may be necessary. The frequency of your opener’s remote control determines the signal it sends to activate the door. There are several reasons why you might need to change this frequency:

  1. Interference Issues: If you’re experiencing interference from neighboring garage door openers or other electronic devices, changing the frequency can help mitigate these issues.
  2. Security Concerns: Changing the frequency adds an extra layer of security by making it more difficult for potential intruders to intercept the signal and gain unauthorized access to your garage.
  3. Upgrading Technology: If you’re upgrading your garage door opener system or adding new remotes, changing the frequency may be necessary to ensure compatibility and optimal performance.

Before You Begin:

Before embarking on the process of changing the frequency of your garage door opener, there are a few essential steps to take:

  1. Read the Manual: Familiarize yourself with the manufacturer’s instructions and recommendations for changing the frequency. Each garage door opener model may have specific procedures that you need to follow.
  2. Gather Tools: Ensure you have all the necessary tools and equipment on hand, including a ladder, screwdriver, and possibly a frequency-changing kit provided by the manufacturer.
  3. Safety First: Always prioritize safety when working with electrical components. Disconnect power to the garage door opener to prevent accidental activation and potential electrical shocks.

Changing the Frequency:

Now that you’re prepared, let’s walk through the steps to change the frequency on your garage door opener:

  1. Access the Opener’s Control Panel: Start by locating the control panel on your garage door opener unit. This panel typically houses the programming buttons and indicator lights needed for frequency adjustment.
  2. Enter Programming Mode: Follow the manufacturer’s instructions to enter the programming mode on your garage door opener. This usually involves pressing a specific combination of buttons on the control panel or remote.
  3. Select a New Frequency: Once in programming mode, use the control panel or remote to select a new frequency for your garage door opener. Some models may have preset frequency options, while others allow you to manually input a frequency.
  4. Sync Remotes: After selecting the new frequency, you’ll need to sync your existing remotes with the updated frequency. This may involve pressing a button on the remote or following specific programming steps outlined in the manual.
  5. Test the Opener: Once you’ve changed the frequency and synced your remotes, it’s essential to test the garage door opener to ensure everything is working correctly. Use the remote to open and close the door multiple times, checking for any issues or irregularities.
  6. Adjust as Needed: If you encounter any problems during testing, such as remotes not syncing or the door not responding correctly, refer to the troubleshooting section of the manual for guidance. You may need to repeat the frequency-changing process or make additional adjustments.

Tips for Success:

To ensure a smooth and successful frequency change, consider the following tips:

  1. Follow Instructions Carefully: Pay close attention to the manufacturer’s instructions and follow each step precisely to avoid errors or complications.
  2. Keep Remotes Handy: Have all remotes and keypads that you use with the garage door opener nearby during the frequency-changing process to ensure they’re properly synced.
  3. Test Regularly: After changing the frequency, periodically test the garage door opener to confirm that it’s functioning correctly and that all remotes are working as expected.
  4. Seek Professional Help if Needed: If you encounter difficulties or are unsure about any step of the process, don’t hesitate to seek assistance from a professional garage door technician.

Conclusion:

Overall, based from Garage Door Repair, changing the frequency on your garage door opener is a relatively straightforward process that can enhance security and resolve interference issues. By following the steps outlined in this guide and prioritizing safety, you can confidently navigate through the frequency-changing process and ensure the continued functionality of your garage door opener. Remember to consult the manufacturer’s instructions and seek professional help if needed to achieve optimal results. With proper maintenance and occasional adjustments, your garage door opener will continue to provide reliable performance for years to come.

Martin Garage Door

10411 S Parker Rd, Parker, CO 80134, United States

303-663-1310

A Guide to Adjusting Your Garage Door Cable Safely and Effectively – Martin Garage Door

As a homeowner, I’ve always taken pride in maintaining my property, and part of that responsibility includes ensuring that my garage door operates smoothly and safely. However, like many others, I’ve encountered issues with my garage door cables over time. Learning how to adjust them properly has been a valuable skill, saving both time and money on professional repairs.

In this Garage Door Repair guide, I’ll share my experience and knowledge on how to adjust a garage door cable safely and effectively.

Understanding the Garage Door Cable System:

Before diving into the adjustment process, it’s crucial to understand the basics of the garage door cable system. The cables play a vital role in lifting and lowering the door smoothly along the tracks. They are typically made of strong steel and are attached to the bottom corners of the door and the garage door springs. These cables wind around a drum when the door opens and unwinds when it closes, providing the necessary tension to support the weight of the door.

Identifying Common Issues:

When it comes to garage door cables, several common issues may arise, indicating the need for adjustment:

  1. Loose Cables: If the cables become loose, the door may appear uneven when opening or closing, leading to potential safety hazards.
  2. Misaligned Tracks: Misalignment can cause the cables to come off the drum or pulley, preventing the door from functioning correctly.
  3. Frays or Damage: Over time, cables may fray or become damaged due to wear and tear, compromising their strength and functionality.

Safety First:

Adjusting garage door cables involves working with heavy-duty components under tension, making safety a top priority. Before starting any adjustments, it’s essential to:

  1. Disconnect the Power: Disable the automatic opener by unplugging it from the power source to prevent accidental activation.
  2. Secure the Door: Ensure the garage door is fully closed and secure by engaging the manual lock or using clamps to prevent movement.
  3. Use Protective Gear: Wear safety glasses and gloves to protect against potential injuries from sharp edges or sudden movements.

Adjustment Process:

Now, let’s walk through the step-by-step process of adjusting garage door cables:

  1. Inspect the Cables: Begin by visually inspecting the cables for any signs of wear, fraying, or damage. If you notice any issues, such as broken strands or excessive wear, it’s best to replace the cables entirely rather than attempting to adjust them.
  2. Locate the Adjustment Points: Most garage door systems have adjustment points near the bottom brackets where the cables attach to the door. These adjustment points may be in the form of bolts or nuts that can be tightened or loosened to adjust cable tension.
  3. Tighten or Loosen the Cables: Using a wrench or socket set, carefully adjust the tension of the cables by turning the adjustment bolts or nuts. If the cables are too loose, tighten them gradually until they are snug against the bottom brackets. Conversely, if the cables are too tight, loosen them slightly to provide the appropriate amount of tension.
  4. Test the Door: After making adjustments, manually lift the garage door a few inches off the ground and release it to see how it operates. The door should move smoothly without any jerking or unevenness. If necessary, make further adjustments until the door operates correctly.
  5. Check the Balance: Finally, perform a balance test by disconnecting the garage door from the opener and manually lifting it halfway. The door should stay in place when released, indicating that it is properly balanced. If the door moves up or down on its own, additional adjustments may be required.

When to Seek Professional Help:

While adjusting garage door cables is a manageable DIY task for many homeowners, there are situations where professional assistance may be necessary:

  1. Complex Issues: If you encounter complex issues such as broken springs or severe cable damage, it’s best to leave the repairs to trained professionals who have the expertise and tools to handle the job safely.
  2. Safety Concerns: If you feel uncomfortable or unsure about performing the adjustments yourself, don’t hesitate to contact a professional garage door technician. Safety should always be the top priority.

Conclusion:

Overall, based from Garage Door Repair, learning how to adjust garage door cables can save you time and money while ensuring the continued smooth and safe operation of your garage door. By following the steps outlined in this guide and prioritizing safety, you can tackle this DIY task with confidence. However, remember that some issues may require professional intervention, so don’t hesitate to seek help when needed. With proper maintenance and occasional adjustments, your garage door will continue to serve you reliably for years to come.

Martin Garage Door

10411 S Parker Rd, Parker, CO 80134, United States

303-663-1310

Maintaining Your Garage Door Springs – EDM Garage Doors, LLC

Maintaining garage door springs may not be the most glamorous of tasks, but as a homeowner who has experienced the importance firsthand, I can attest to its significance in ensuring the smooth and safe operation of your garage door. Garage door springs play a crucial role in lifting and lowering the door with ease, but they require regular maintenance to prevent wear and tear, prolong their lifespan, and mitigate the risk of accidents.

In this comprehensive guide from Garage Door Repair, I’ll share my firsthand insights, practical tips, and step-by-step instructions for effectively maintaining your garage door springs.

Understanding Garage Door Springs:

Before diving into maintenance procedures, it’s essential to understand the two main types of garage door springs:

  1. Torsion Springs: These springs are mounted above the garage door and are typically found in newer garage door systems. Torsion springs store and release energy as the door opens and closes, providing smooth and controlled movement.
  2. Extension Springs: Extension springs are mounted on either side of the garage door and stretch and contract to support the door’s weight. They are more commonly found in older garage door systems.

The Importance of Regular Maintenance:

Garage door springs are under immense tension and are subject to constant stress during operation. Without proper maintenance, they can become worn, corroded, or weakened over time, leading to potential safety hazards and costly repairs. By performing regular maintenance, you can:

  • Extend the lifespan of your garage door springs
  • Prevent sudden failures and accidents
  • Ensure the smooth and efficient operation of your garage door
  • Save money on costly repairs or replacements

Essential Maintenance Tasks for Garage Door Springs:

  1. Visual Inspection: Start by visually inspecting your garage door springs for signs of wear, rust, or damage. Look for any fraying, gaps, or gaps in the coils, which could indicate weakening or imminent failure.
  2. Lubrication: Apply a high-quality garage door lubricant to the springs, coils, and other moving parts to reduce friction and prolong their lifespan. Be sure to use a lubricant specifically designed for garage door components and avoid using grease or oil-based products, which can attract dirt and debris.
  3. Tension Adjustment: Torsion springs may require periodic tension adjustments to ensure they are properly balanced and functioning correctly. This adjustment should be performed by a trained professional using specialized tools and techniques to avoid injury or damage to the springs.
  4. Safety Cable Inspection: If your garage door is equipped with extension springs, check the safety cables attached to each spring to ensure they are intact and properly secured. Safety cables help prevent the springs from becoming projectiles in the event of a failure.
  5. Professional Inspection: Schedule an annual inspection with a qualified garage door technician to thoroughly assess the condition of your springs and perform any necessary maintenance or repairs. A professional inspection can help identify potential issues early on and prevent costly problems down the line.

Tips for Safe and Effective Maintenance:

  • Always disconnect power to your garage door opener before performing any maintenance tasks to prevent accidental operation.
  • Use caution when working with garage door springs, as they are under high tension and can cause serious injury if mishandled.
  • If you’re unsure about performing maintenance tasks yourself, don’t hesitate to seek professional assistance from a qualified garage door technician.
  • Regularly test your garage door’s balance and operation to ensure it is functioning properly. If you notice any unusual sounds, jerky movements, or difficulty opening or closing, contact a professional for inspection and repair.

Conclusion:

Overall, based in Garage Door Repair, maintaining your garage door springs is a crucial aspect of home maintenance that should not be overlooked. By following these practical tips and performing regular maintenance tasks, you can ensure the safety, efficiency, and longevity of your garage door springs for years to come. So, take the time to inspect, lubricate, and care for your garage door springs, knowing that your efforts will pay off in the form of a smoothly operating and safe garage door system.

EDM Garage Doors, LLC

596 Richard Brown Blvd, Volo, IL 60073, United States

847-416-3036

Page 1 of 2

Powered by WordPress & Theme by Anders Norén